Written by Isaac Grossberg, Software Engineer
To get the most out of Rockwell’s FactoryTalk Optix, you need to get familiar with dynamic links. These links are the backbone of automation and data flow in Optix, transforming your UI from static to dynamic. Let’s break down how dynamic links work and how you can leverage them in your projects.
The Fundamentals of Dynamic Links
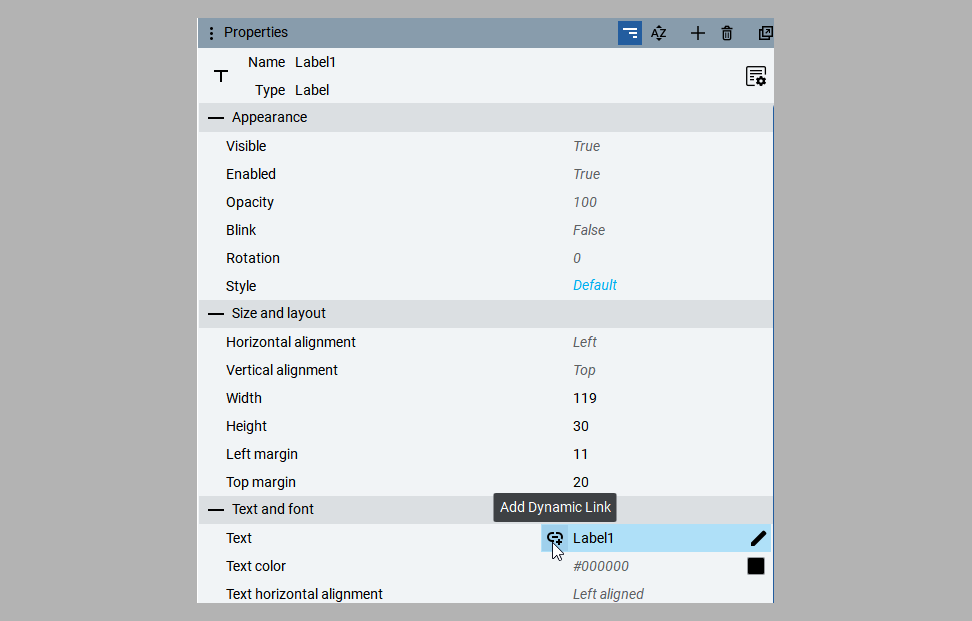
Dynamic links are the core mechanism in Optix that enables real-time data interaction. Just about any component property can be dynamically linked to another variable or property. To create one, click the chain icon next to the property in the Properties window. You’ll see a directory structure pop up—just navigate to the variable or property you want, click ‘select,’ and your link is set. From there, data will automatically flow between the two at runtime.
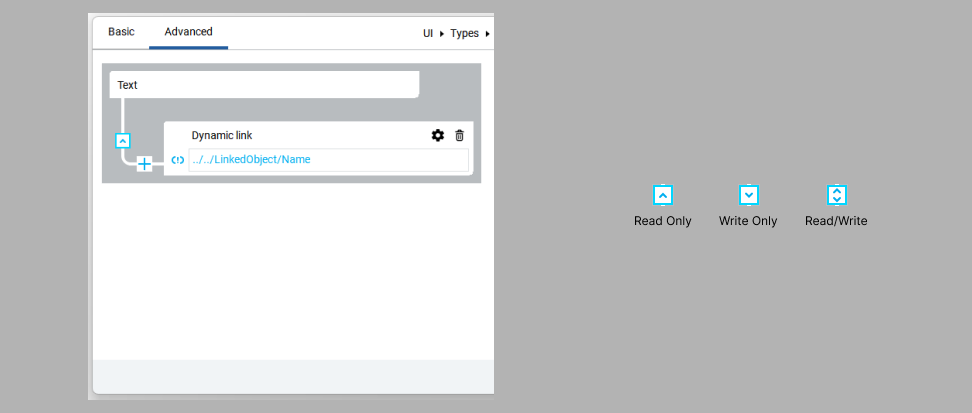
Want to control how the data flows? Head to the Advanced tab. If you see an up arrow, that means it’s read-only, and data can only flow into the property. A down arrow means the property can write data to the variable. And if you’ve got both arrows, you’ve set up bidirectional data flow.
Complex Dynamic Links with Converters
Dynamic linking isn’t limited to simple data transfers. You can use converters to transform data as it moves between properties. Head to the Advanced tab, click the ‘+’ button, and you can add a converter to your link. You can even stack multiple converters to handle more complex transformations.
Engineering Unit Converter
The Engineering Unit Converter allows you to define a conversion rate between the source and destination, designed specifically to handle an analog variable as input. While it might overlap with what an expression evaluator can do, it’s still worth mentioning. In this example, you’ll be converting from inches to centimeters. The raw min and max values define the boundaries of your input, while the scaled min and max set the boundaries for the output.
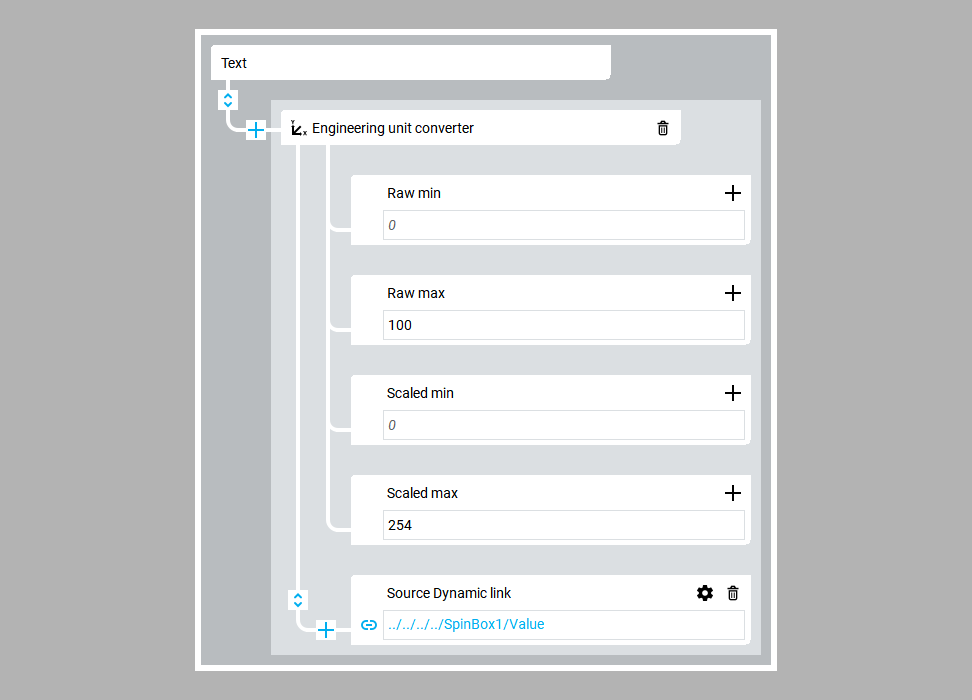
With the conversion set, your input value in inches will now be automatically scaled to centimeters at the output.

Linear Converter
This one’s straightforward. The Linear Converter lets you define a linear relationship between variables using a slope and y-intercept. The slope is your multiplier, and the y-intercept adjusts the offset.
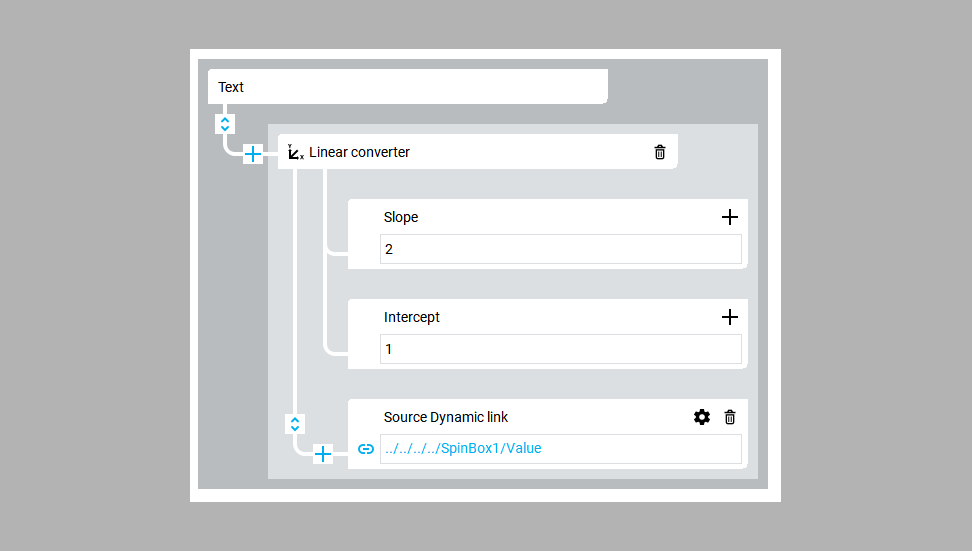
As you can see, the input value is translated based on the slope and y-intercept you’ve defined, resulting in a linear output.

Key-Value Converter
The Key-Value Converter is a versatile tool for converting data types. It uses a lookup table to map inputs to outputs. For instance, you can convert a string (like a color name) into a hexadecimal value for an LED.
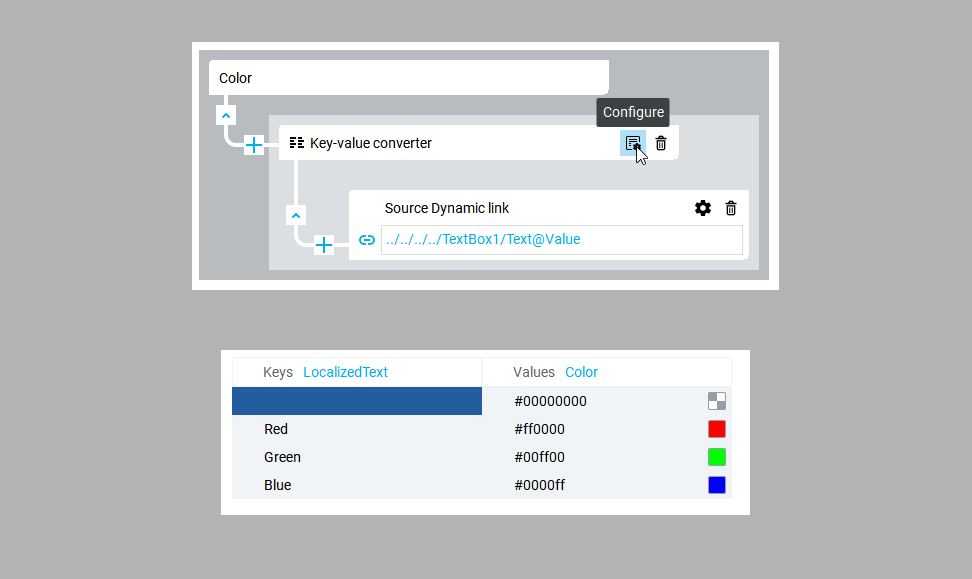
In this example, the LED changes color based on the string you’ve entered.

String Formatter
The String Formatter is perfect when you need to manipulate strings. It allows you to take an input value and format it with a dynamic injection. For example, you can prepend a string to an input value.
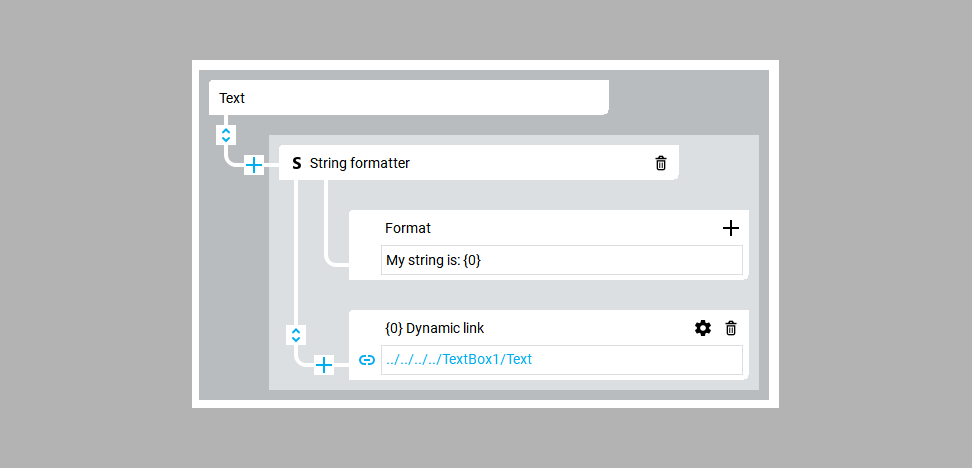
The result? Your input string is now neatly formatted with your prefix.

Expression Evaluator
Need to perform calculations? The Expression Evaluator allows you to apply programmatic syntax to evaluate expressions on the fly. You have a range of operators at your disposal. In this example, you’re calculating the average of two spin box values.
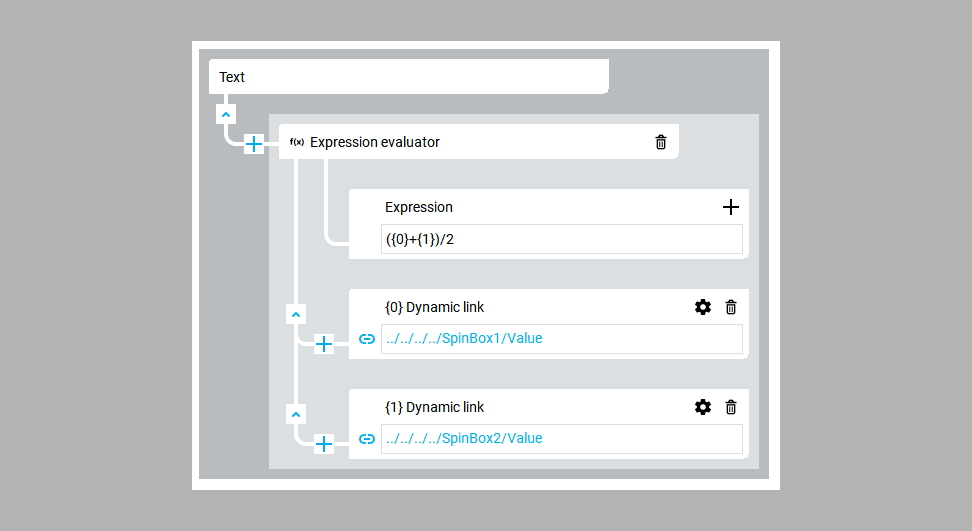
Here’s the output, showing the average of the two input values.

Conditional Converter
With the Conditional Converter, you can set up branching logic based on a Boolean input. This converter is great for controlling outputs based on true/false conditions. For example, you can change the color of an LED based on the state of a switch.
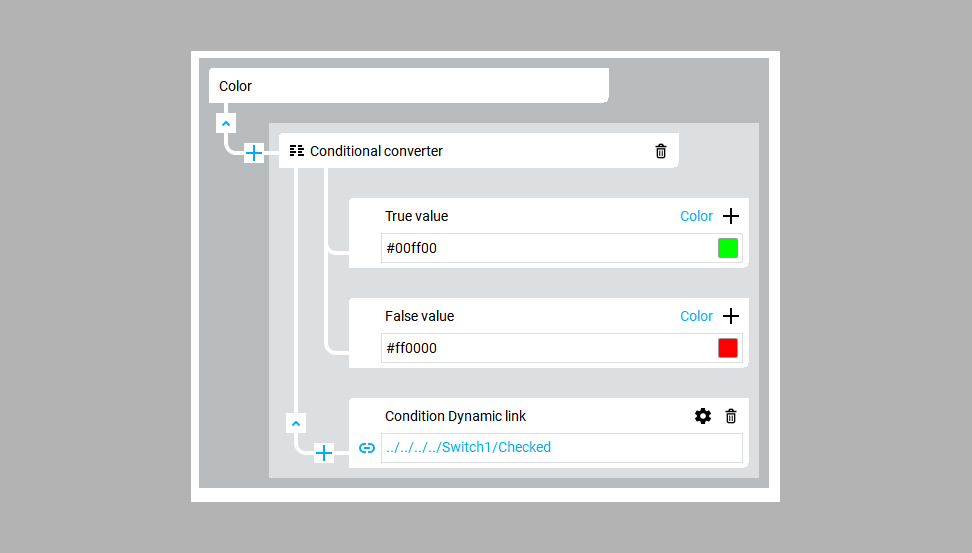
Here, the switch determines the LED’s color, adding a layer of control without direct interaction.

Formatted Dynamic Links
One of the less obvious features of Optix is formatted dynamic links, which allow the path to a linked variable to contain dynamic elements. To create one, edit the path text for the dynamic link and insert {0} where you want the dynamic data to be injected. Optix will handle the rest, creating a dynamic link on the fly.
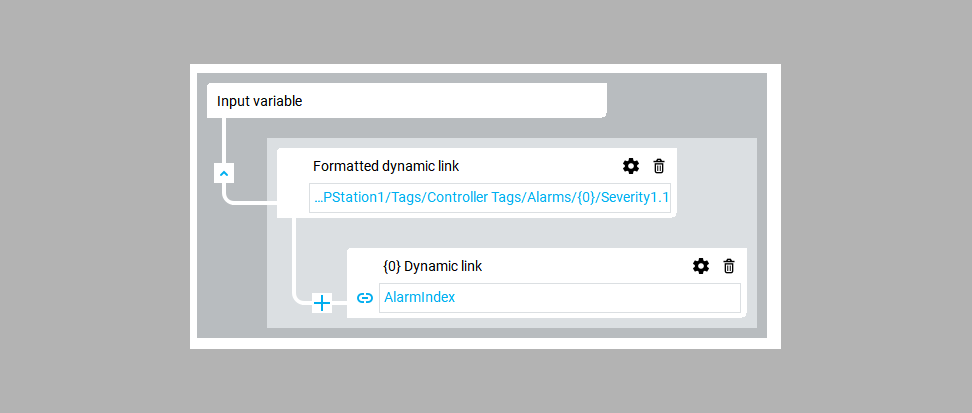
This feature is especially useful for working with arrays, such as PLC alarm tags. By using a variable to set the array index, you can avoid hardcoding values and simplify maintenance. Now, you can easily duplicate alarms without adjusting the dynamic link—just update the index variable or link it directly to a PLC tag for automatic updates.
Conclusion
As we wrap up this final post in the FactoryTalk Optix series, you should now have a strong grasp on the key concepts we’ve covered—from NetLogic’s ability to break through software limitations to the efficiency gains you’ll see by leveraging Object-Oriented Programming, and finally, the power of Dynamic Links to automate data flow and UI generation.
Together, these tools make FactoryTalk Optix one of the most versatile platforms for building modern, scalable HMIs. It might have seemed overwhelming at first, but by digging into these advanced features, you’ve unlocked the true potential of Optix. Whether handling complex UI elements or automating data between systems, you’re now equipped to push your projects further.
This series has been all about showing you how to use FactoryTalk Optix and how to optimize it—giving you the power to design more efficient, dynamic, and customizable systems. Keep experimenting, refining, and applying what you’ve learned here. Optix has plenty of depth left to explore, and I hope this series has provided a solid foundation for you to keep building on.
Thanks for following along, and here’s to more efficient and scalable projects ahead!

